nano-router connection
This tutorial will allow you to connect a TP-LINK TL-WR802N router to your product.
Required hardware :
- TP Link nano-router
- ethernet (RJ45) cable
- micro-USB cable
Everything is included in the nano-router package.
Installation
Plug in the router. Connect the ethernet and USB cables to your product
Configuration
For TL-WR802N routers
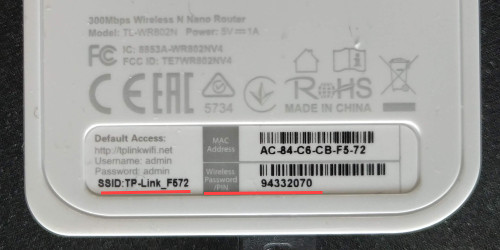
Connect to the wifi network using the SSID and password printed on the back of the device
Your computer will probably warn you of a limited connectivity connection.

Open a web browser and navigate to http://tplinkwifi.net or http://192.168.0.1
Type in defaults credentials :
      Username : admin
      Password : admin

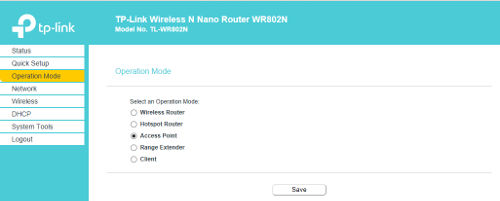
In the Operation Mode tab, select Access Point, then Save. Confirm the reboot and reconnect if necessary.
Usage
Once plugged, your product is readily accessible.
MacOS
access your product using it’s dns-sd local hostname :
http://irisxx-XX.local
replace irisxx-XX with your product name and serial number (ie. an Iris 32” numbered 40 will be named iris32-40).
Other OS
You can fetch the direct-access IP of your product using one of the following methods :
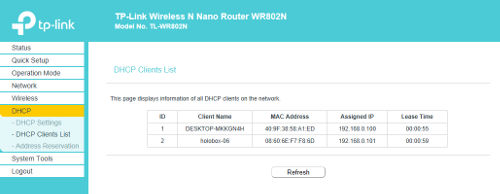
In the router’s administration interface (http://tplinkwifi.net or http://192.168.0.1). Go to DHCP > DHCP Clients List and find your product.

Use a network scanner, like nmapor avahi-browse (linux)