Direct wired connection
It is possible to connect directly to the product via an Ethernet cable. This requires equipping the latter with a local DHCP server.
Direct connection with Windows
Tested for Windows 7 and Windows 10
Configure the OpenDHCPServer
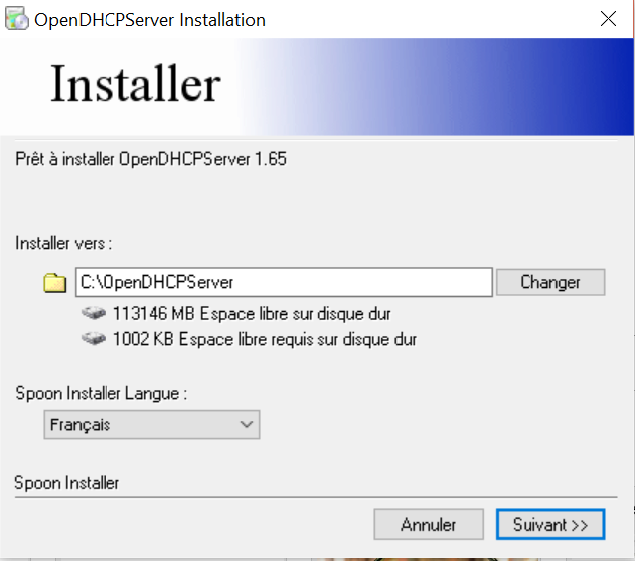
Download and install OpenDHCPServer. Use this installer for Windows.
Note : OpenDHCPServer is a software free of use under the license GNU-GPLv2. Its authorized for this usage.
Note the directory used by the installer. Uncheck the option launch the program: Install as a service : We will launch the server manually when necessary.
Once the installation is complete, this file should contain the following documents :
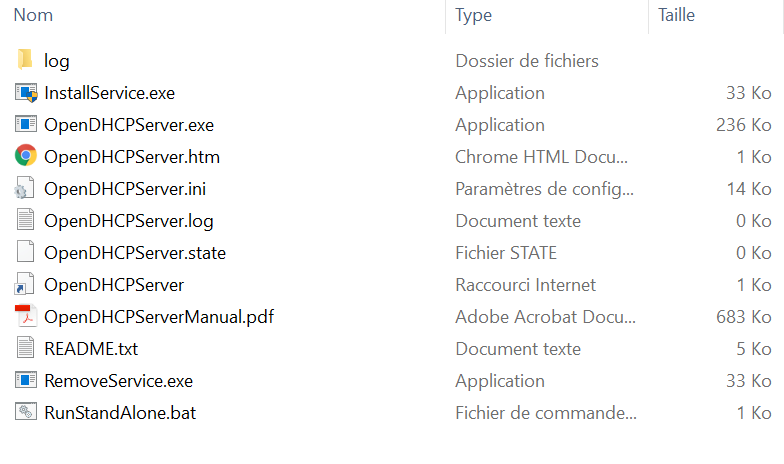
Replace the default configuration file (OpenDHCPServer.ini) with this one. The 2 important parameters are:
[LISTEN_ON]
192.168.0.1

[RANGE_SET]
DHCPRange=192.168.0.2-192.168.0.20
Advanced User : You can modify the configuration to better suit your needs. For example, specify the interface to use in case of multiple choices.
Configure the interface of the network
Connect the Ethernet cable to the product on one side and to your computer on the other.
If your computer doesn’t have an Ethernet port, you can use a USB adaptor.
Open the settings of “connect network” on your computer.
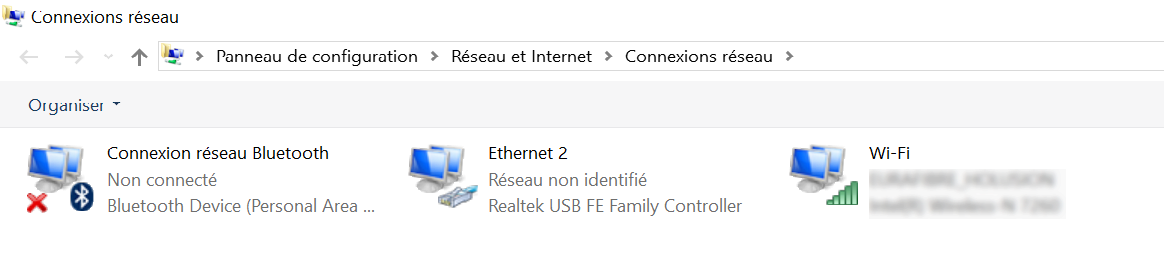
Note : Depending on the version of Windows, the name of the menus to access it changes: “network and sharing center”, “network settings”, etc…
Right-click and edit the properties of your Ethernet port (on the image, Ethernet2).
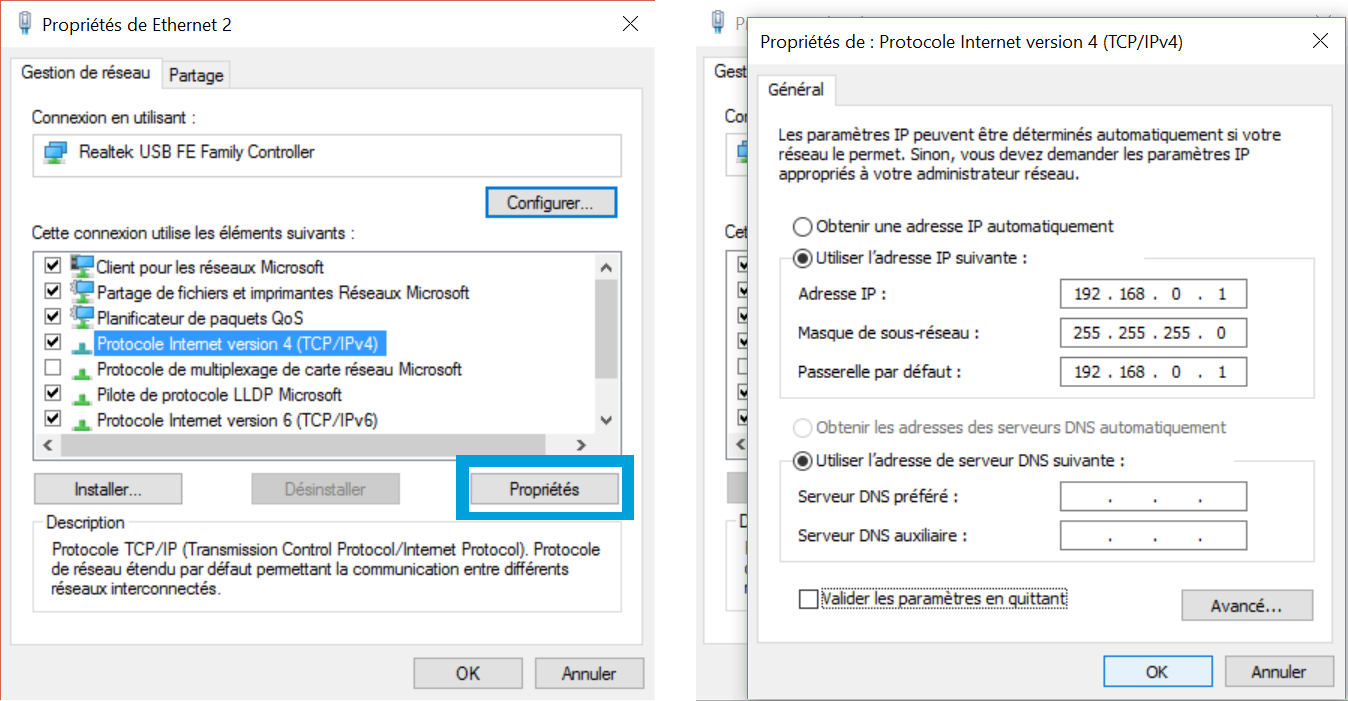
To the left we have the properties of the interface, to the right the properties “TCP/IPv4”.
The properties of the Internet Protocol Version 4 (TCP/IPv4) element must be modified. If your interface is already configured in a particular way, note the parameters before modifying them so that you can find them later.
We will assign a static IP with the following parameters:
Adresse IP: 192.168.0.1
Masque de sous-réseau: 255.255.255.0
Passerelle par défaut : 192.168.0.1
Validate the modifications and close the window.
Warning : If you use several different USB-Ethernet adapters, they will sometimes take on different numbers, making it necessary to repeat the operation.
Plugging
Once the previous steps are correctly done, just double-click on the RunStandAlone command file. It will open a command window that will inform you about the status of the system:
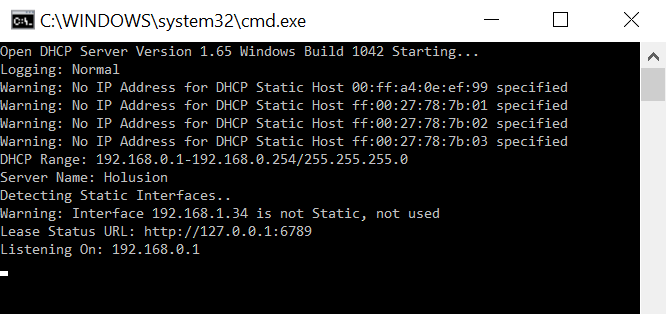
"Listening On: 192.168.0.1" shows that the network interface has been successfully configured.
It is important to take note of all the information given in this window if the manipulation does not work, they will allow you to understand the source of the problem.
At this stage, it is generally necessary to restart the Holusion product while leaving the Ethernet cable connected so that it detects the network change.

A successful IP allocation :
The list of allocated IPs is also available at: http://localhost:6789
You can now access your product normally at http://192.168.0.2
Deactivation
You will notice that once the manipulations have been carried out, your interface will no longer connect to other wired networks. To deactivate the DHCP server and return to normal, simply return to the network interface settings and, in the TCP/IPv4 properties, check Obtain an IP address automatically.